Continuous Bias Binding
By Claire Tyler
Making a bias binding from a small square of fabric is a great scrap buster and allows for adding imaginative binding to sewing projects.
Step 1
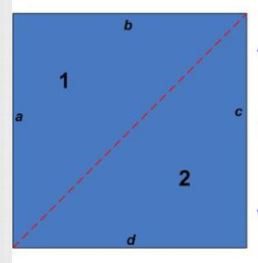
Cut a square of fabric and lay right side down, Fold at a diagonal to find the true bias – finger press. Open out the fabric, mark the left side 1 and the rights side 2. Cut along the crease.
Step 2
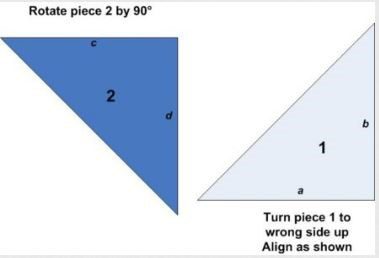
Move 1 to one side leaving it wrong side up. Turn piece 2 right side up.
Step 3
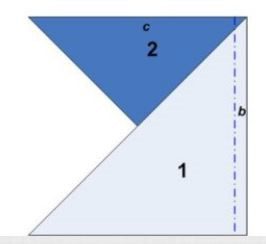
Place 1 on top of 2 so they are right sides together and the bias-cut edges form an X.
Step 4
Pin along the straight edge and stitch with a 6mm (1/4”) seam.
Step 5
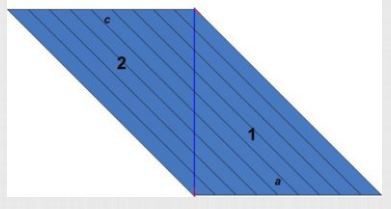
Press the seam open, and place right side down.
Step 6
Working from left to right mark lines parallel to the bias edges all the way across, the distance between the lines should be the width you would like your bias tape to be – if you plan to make a double folded tape then make the strips twice the width you would like you bias to be.
Step 7
Along the top mark the lines from 1, 2, 3 etc.
Step 8
Along the bottom mark lines from 0, 1, 2, 3 etc.
STEP 9
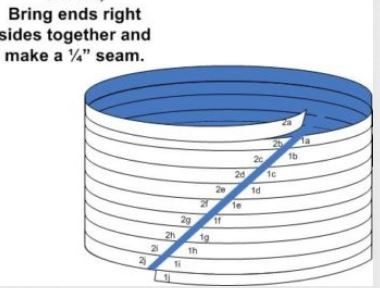
Fold the fabric right sides together matching the numbers, pin. Stitch 6mm (1/4”) seam – use a smaller stitch. Press the seam open.
Step 10
Cut along the lines into one long strip.
Further information
Claire Tyler Couture teaches dressmaking and couture dressmaking at her studio in Midhurst, West Sussex. For further details of courses available, visit www.claire-tyler.com or email: [email protected]
