
Don’t Chop Off The Points
By Carolyn Gibbs
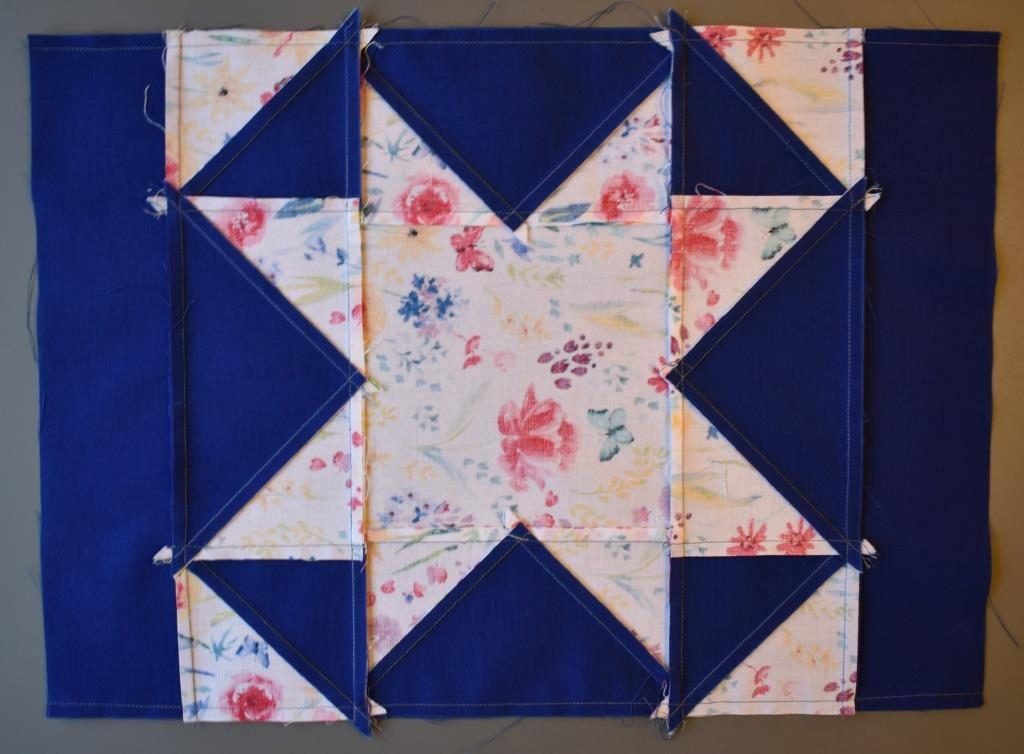
One of the most frustrating mistakes in patchwork is when you are trying to stitch pieces together to make a beautiful design – but you somehow chop off the points. There are a number of tips which can help improve your results. I’ll illustrate this by showing how I constructed a Magic Cross Design.
TIP: A free download pattern for this block, with full instructions and all these tips is available from Carolyn’s online shop, see details below.
Flying Geese
Which way up when you stitch?
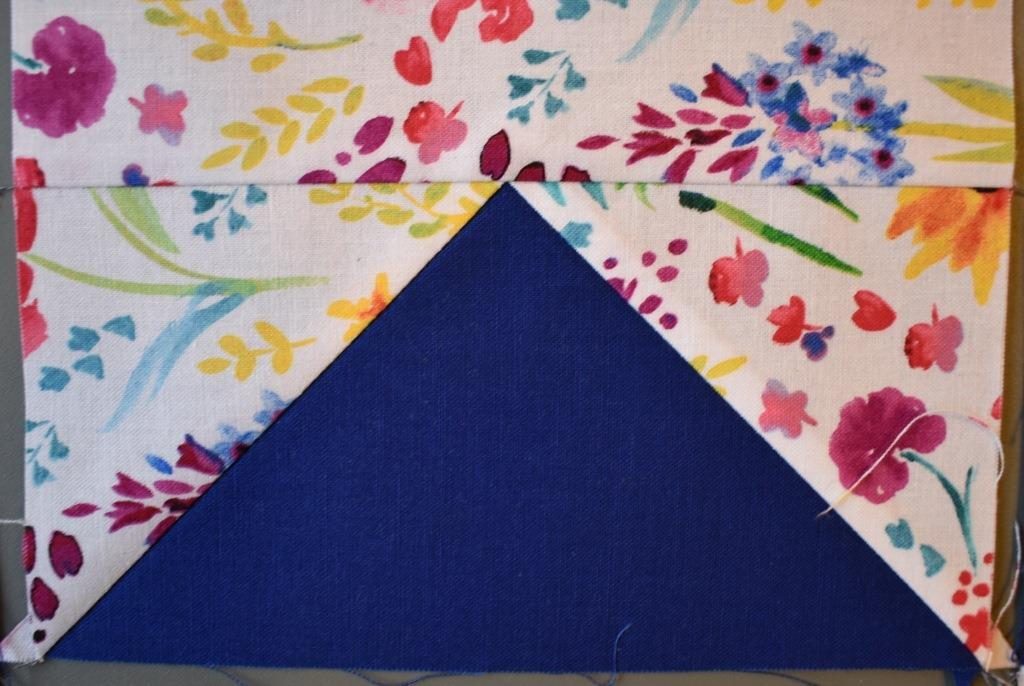
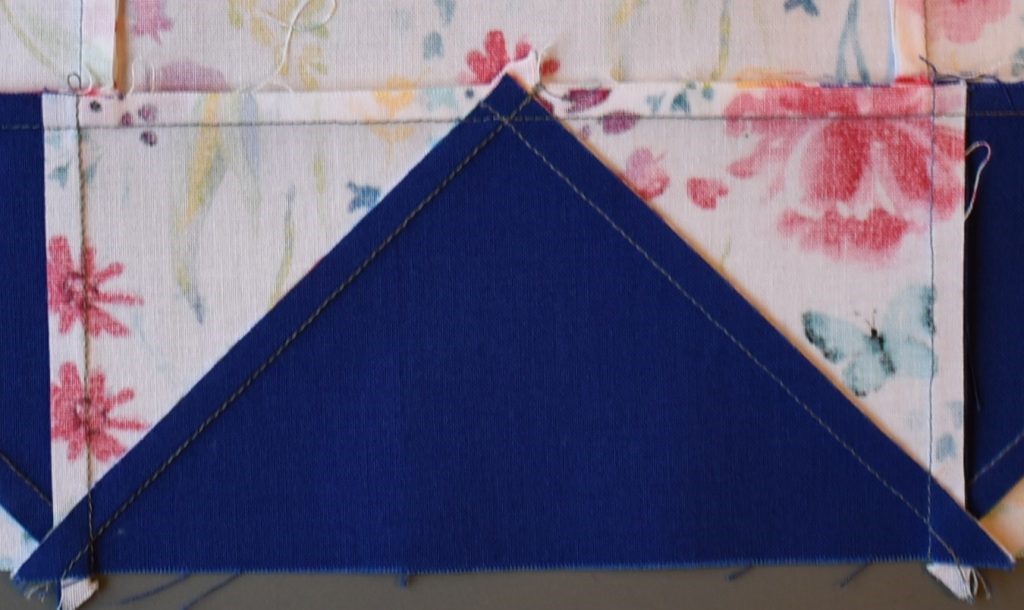
Firstly, when you start to stitch the units into rows, pin and stitch with the Flying Geese units on top so that you can see the triangle point and aim to stitch exactly through it (even if this means a slight deviation from your ¼” seam – the point is more important!)
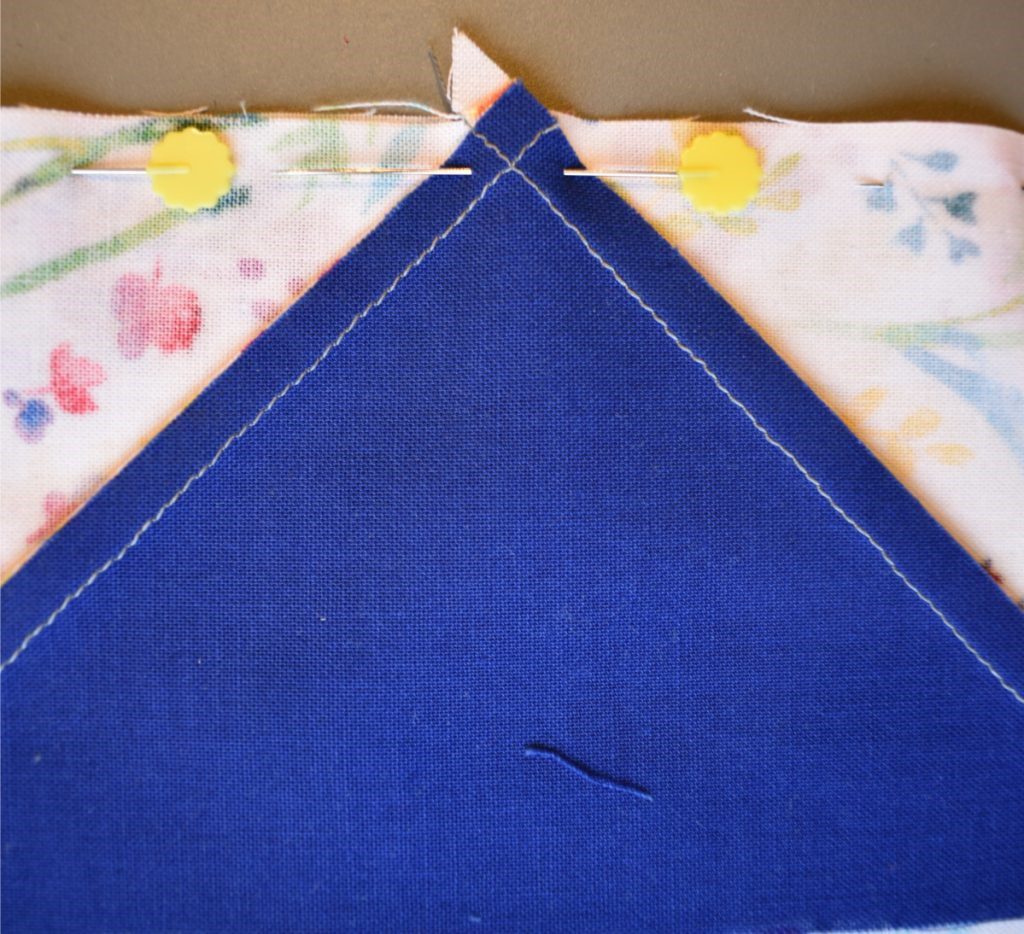
I place the pins through the crossover point, so that I know exactly where to aim for when stitching.
Half Square Triangles
Pressing directions: diagonal seams
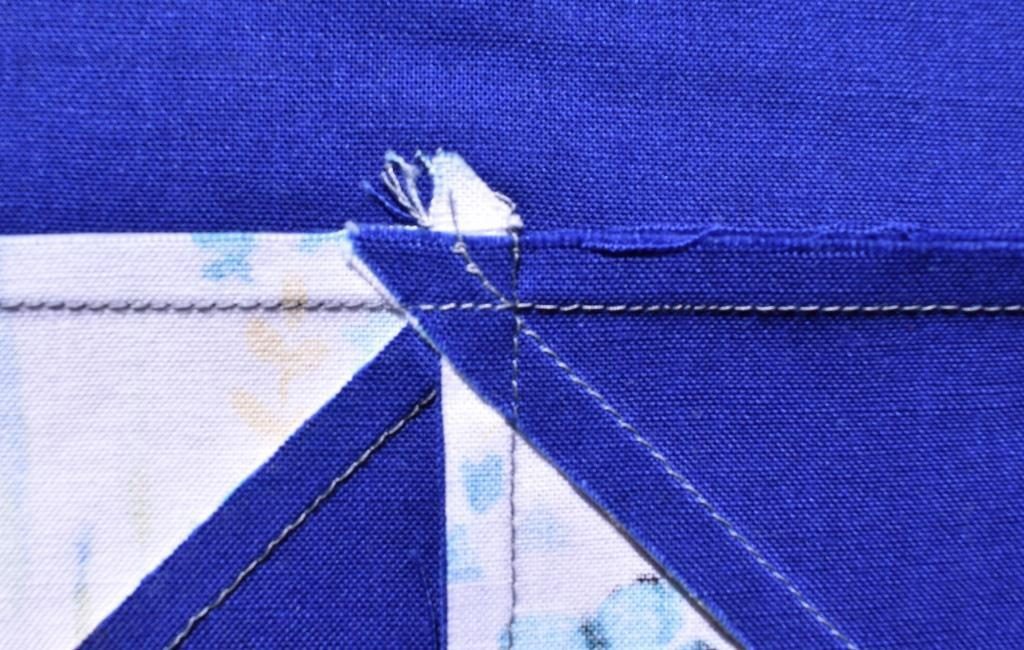
To be able to do this however, this crossover point needs to be visible. In the photo here, you can’t see the crossover, because of the way the seams have been pressed. Compare to the photo above.
Don’t press the seams in towards the large triangle.
The Flying Geese seams need to be pressed out towards the small triangles, like the previous photo above.
Don’t worry that this is behind the Light fabric. Although patchworkers are often taught to “press seams behind the dark fabric” the problem of a shadow showing through is less likely with the excellent quality fabrics available now. This is only a good rule if no other reasons apply.
Have the courage to break the rule under certain circumstances, and prioritise perfect points instead, which everyone will notice far more!
As an aside, although you need to press “out/out” for this particular block, it actually doesn’t normally matter for the first one you stitch, but the second one must be pressed out, if the crossover is to be visible. (Don’t think of this as right and left, by the way, as you may not always stitch the same side first, particularly if you are quick-piecing)
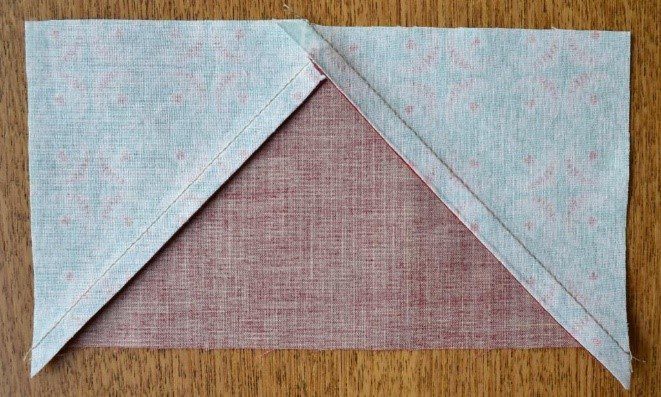
When you join the completed Flying Goose to a plain section, press this new seam away from the tip of the Flying Geese unit – if you turn it back, it makes a very bulky area.
Pressing the horizontal seam away from the triangle point reduces bulk.
Column seams
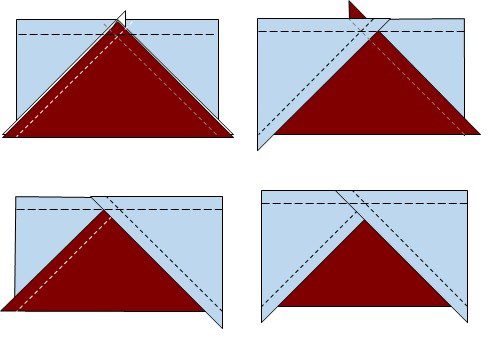
The column seams need to meet pressed in opposite directions, so they nestle when you do the Row seams next.
- So, because we have just decided to press the middle seams away from the Flying Geese units, (in towards the large central square), the top and bottom seams need to be pressed in the opposite direction – outfrom the centre.

Pressing direction of diagonal seams next to Flying Geese
Where any seams meet, the join will be flatter if the bulk is spread out. If the seams are both pressed to the same side, this gives a very bulky join, and as the machine travels from two thicknesses up to six, the fabric layers are likely to shift, causing the line-up to move.
Because this block contains half square triangles which touch Flying Geese on both sides, we need to consider how their pressing direction can be chosen so they meet pressed in the opposite direction to the Flying Geese, where decisions have already been made.
I have planned the pressing, so that wherever they meet, you can “shuffle” the diagonal seams until they nestle snugly together. Pin across the diagonal seam to hold securely in place, and then, when you stitch a seam along the side, this should give a neat meeting of the points.
There is more information about this technique on the Pressing for Perfect Points page of the Carolyn Gibbs Quilts website, including a video. It really does make a difference.
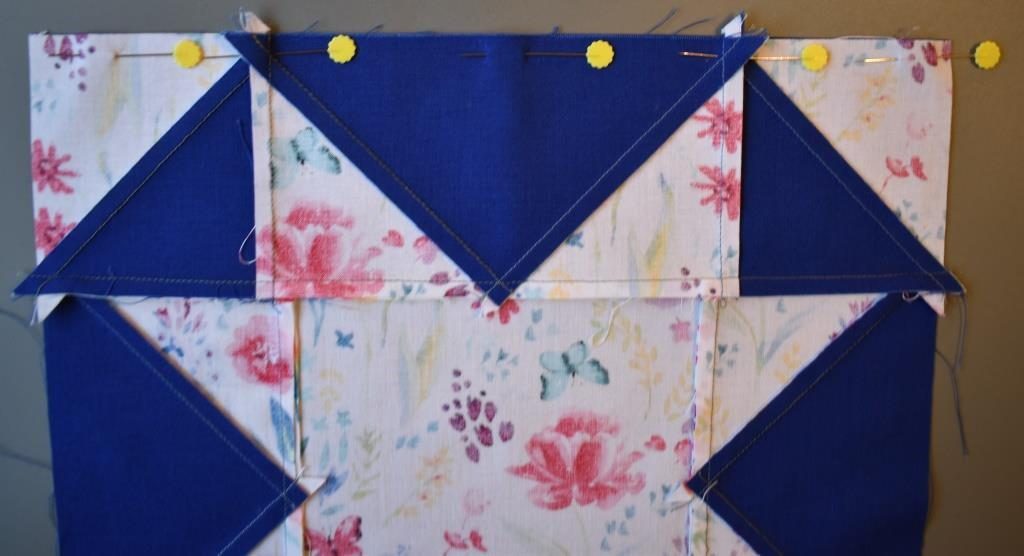
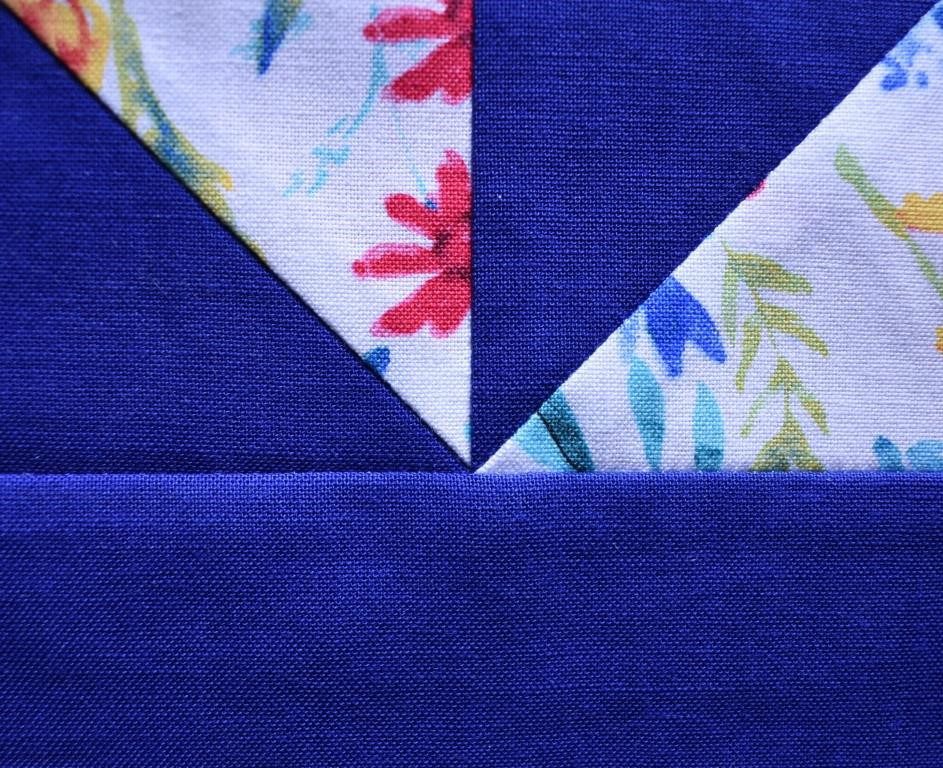
The trick when adding a border or sashing is an extension of an earlier idea – that to get perfect points, you need to be able to see the crossover of previous lines of stitching.
This means that you need to pin and stitch with the pieced block on top. This is not easy to remember – it seems instinctive to put the long plain border on top, but then of course, you cannot see anything about where you are stitching the block!
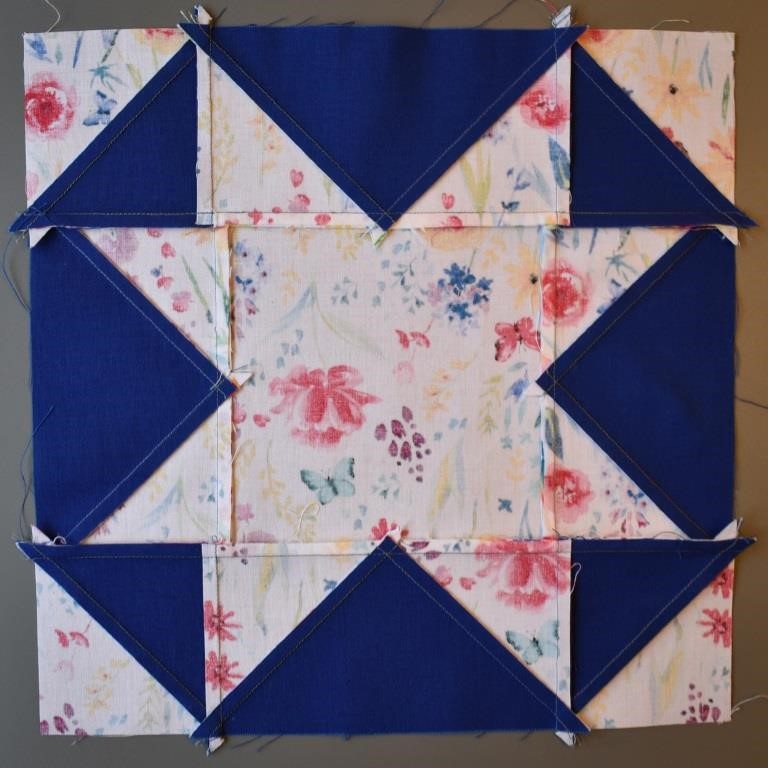
Attaching a border to the Magic Cross Design
Can you see how the points of the large Dark triangle are formed where the diagonal and vertical seams cross over? This is the place you need to aim for again when stitching the horizontal border seam.

There are, of course also points of the Light triangles on the Flying Goose, and of both colours on the half square triangles. Unfortunately, these are hidden by other seams – unless you are joining to a plain square, it is unavoidable that something important cannot be seen.
However, if you have shuffled the diagonal seams successfully in the block assembly, then the unseen part should be at the same place as the part you can see.


Further information
I hope you have appreciated how these tips can produce a crisp, accurate finished result. If you would like to try this out for yourself, a pattern for this block is available as a free download – with full instructions including all the tips above.
There are more suggestions for improving your patchwork and quilting in the Techniques section. If you would like to make a full sized project from a pattern which has all the best pressing directions already worked out for you, look in my online shop.