
Craft Basket Liner with Pockets
By Wendy Gardiner
Transform a plain basket into an attractive storage item with pleated pockets for all sorts of bits and bobs.

You will need:
- 2 Fat Quarters
- High Loft wadding
- Pack of 6mm wide elastic (1/4”)
- Pinking Shears
- Safety Pin
- 4-6 Bull dog clips
- A small basket
Step 1
Preparation
Place basket on the wadding and draw around the base. Cut one or two layers out and put into the basket.

Step 2
Measure the height of the basket sides and the circumference. Cut wadding to this measurement and tuck into the basket around the sides.
Step 3
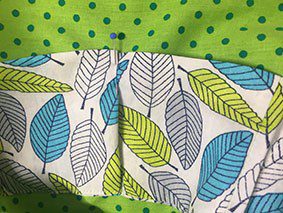
To determine the size of the pocket, measure around the basket at top edge and add 5cm (2”). Measure height of basket from base to top – double this. Cut a rectangle from the second fat quarter to this measurement. Note you may need to join pieces to get the full length required.
Step 4
To make up
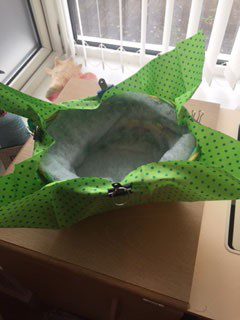
Place 1 fat quarter, right side up on a flat surface and then place the basket on the fat quarter. Bring up the sides and anchor in place midway along each side/end using bulldog clips so that there is at least 4cm 1 ¾”) overlap (this will be used to form the elastic casing and fold over the top).
Step 5
Pin darts at corners/curves to remove excess, pinning through fabric close to the basket. Cut off the excess, leaving a 1cm seam allowance (3/8”). Stitch darts. Neaten raw edges with pinking shears. Press.
TIP: Press all seam allowances in the same direction to make it easier to insert elastic in casing later.

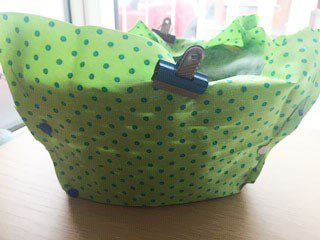
Step 6
Casing – turn under 6mm on top edge and then again 10mm (1/4” and 3/8”). Press, pin and stitch close to the inner fold to create a casing for the elastic. Leave 2cm unstitched along one long edge.

Step 7
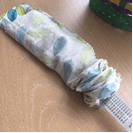
Pockets
Fold the pocket piece in half right sides together and stitch one short end and along the long edge. Turn through by pushing the stitched end into the tube all the way through. Press, folding the raw ends inside.
TIP: Use a ruler to push the pocket section through to right way out.
Step 8
Tuck the stitched end of the pocket piece inside the unstitched end, lapping by 6mm (1/4”). Stitch to close opening and create a circle.
Step 9
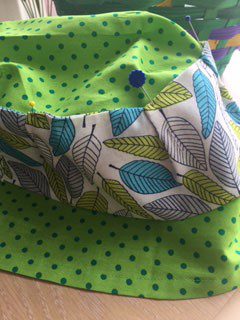
With liner right side out, position the bottom edge of the pocket along the base of the basket liner, and pin, taking a 1cm (3/8”) pleat approximately every 8cm (3”). Stitch pocket to liner close to the bottom edge, catching the pleats as you go.
Step 10
Stitch from top of pocket to base in line with the pleats, but avoiding catching the pleat at the bottom. Once pockets are stitched, refold pleat, pin and press. Remove pins.
Step 11
Wrap elastic around the top of the basket to measure amount needed. Deduct 3cm. Using a safety pin, feed the elastic through the casing in the lining. Distribute gathers evenly. Overlap elastic ends by 2cm, zigzag stitch together. Pull on casing to get elastic to disappear inside. Machine sew the opening in casing closed.
Step 12
Insert lining into basket and fill with your goodies.
Further Information
This project is from Take Two Fat Quarters – Home by Wendy Gardiner and published by Search Press in March 2020. It includes 16 gorgeous sewing projects for using up your fat quarter stash as well as a full chapter with lots of useful techniques illustrated by easy to follow illustrated step by step instructions.
A full-size pattern sheet is also included for the projects that require pattern pieces. Priced £9.99 this, and the companion book Take Two Fat Quarters – Gifts, are available from Searchpress.com or amazon.co.uk